Testing
Setup
The Salesforce design system repository is setup as a monorepo so some steps are required to get testing to work in your service. This can be accomplished by extending a configuration within the root folder of your service.
- Create new file in your root folder called
jest.config.js. - Extend the base config file.
Note, this file is shared across all of the monorepo packages.
const base = require('../../jest.config.base');

module.exports = {
  ...base,
  name: '@salesforce-ux/<service-name>',
  displayName: '@salesforce-ux/<service-name>',
};
- Create a folder named
__tests__to hold you tests. - Add you tests.
Example
/* eslint-env jest */
import * as utils from '../../../../../.jest/utils';
import MyComponent from '../MyComponent';

// Register element
customElements.define('my-component', MyComponent);

describe('my-component', () => {
  afterEach(() => {
    // The jsdom instance is shared across test cases in a single file so reset the DOM
    while (document.body.firstChild) {
      document.body.removeChild(document.body.firstChild);
    }
  });
  it('named part exists on my element', async () => {
    // Mount web component
    const element = utils.renderIntoBody(`<my-component></my-component>`);
    // Get reference
    const button = element.shadowRoot.querySelector('div');
    // Check matchers
    expect(button).toHaveAttribute('part', 'foo');
  });
});
- Run test suite.
npm run test:jest
Testing Libraries
For mock and unit tests, we use Jest. For additional matchers, we also take advantage of Jest DOM. If you have a need for a new library to be installed, please file an issue.
Commands
In your terminal, you can run:
npm run test:jestto run all tests in repository.npm run test:jest -- {filename}to run a specific test.npm run test:jest -- --watch {filename}to execute a watcher on your tests.
Visual Regression Testing
We, the Salesforce Design System, need to ensure we are delivering components with no unintended visual regressions. A design system is meant to be living so there are intended modifications that are constantly being made, but due to the nature of in which we build our components through composition; we could be effecting the component you may be making modifications in another component that is consuming the component through composition. This is why we need visual regression testing, to ensure we don't have unintended side effects.
How to use
We rely on Applitools to check your pull requests against our latest baseline. The baseline is the last approved set of changes made to the main code branch.
When creating a pull request, the intention is to have your PR in a state of definition of done, though you may have subsequent commits and we don't want to run a visual regression test batch on every commit.
Labels
With this in mind, we trigger visual regression checks through Github labels.
We have 2 labels that can be used, vrt:chrome-ready and vrt:full-ready.
vrt:chrome-ready
This label will be faster and run a simple check in Chrome only. This label is useful to have a quick sanity check that you have not effected another component you did not intend to.
vrt:full-ready
This label will take longer but provide visual regression checks in all supported browsers — Chrome, Firefox, Safari, and Edge. This label is required before a PR is able to be merged. This only applies if you have made changes to a component.
The VRT labels are removed on any subsequent commit push to the PR via GitHub Action
Checking for diffs
If your pull request does not have any changes from the baseline, then you are good to go. You should see this in your PR checks:

If you do have diffs from the current baseline, then you need to address those. You should see this in your PR checks:

Clicking on "Details" will take you to the Applitools, assuming you have access.
You should be seeing the results of your PR and the status of any diffs from the baseline:
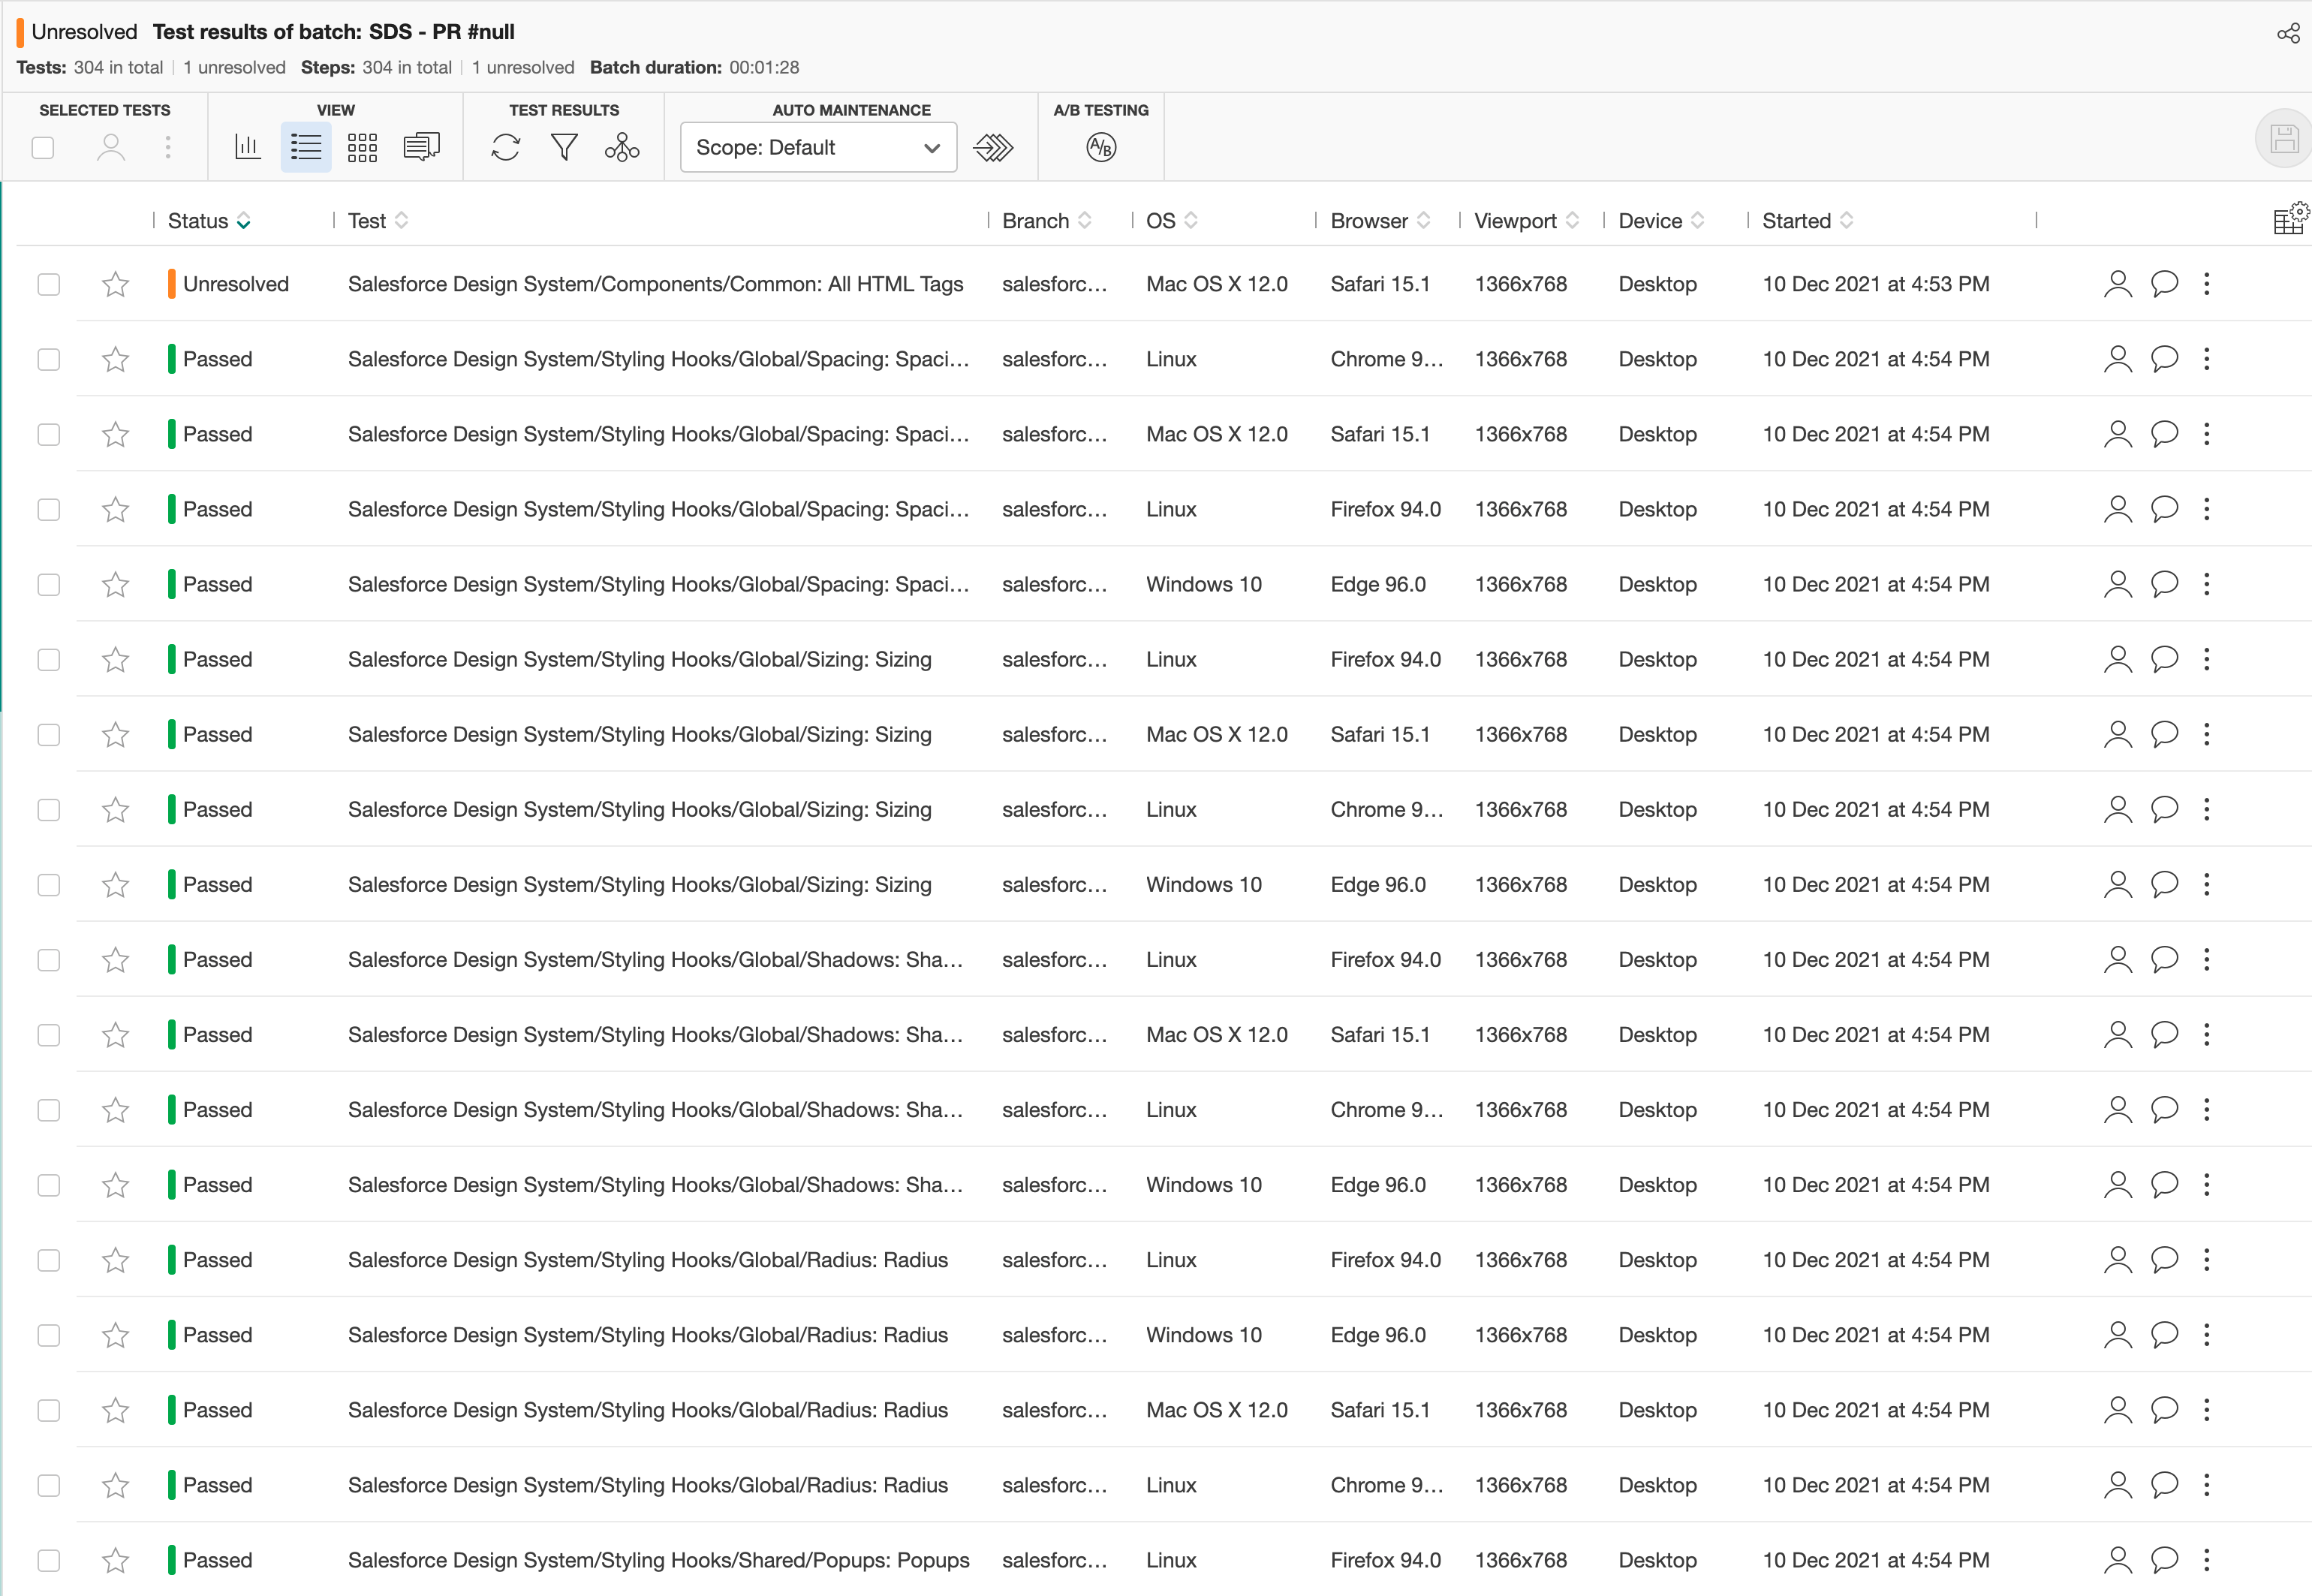
Review the diff
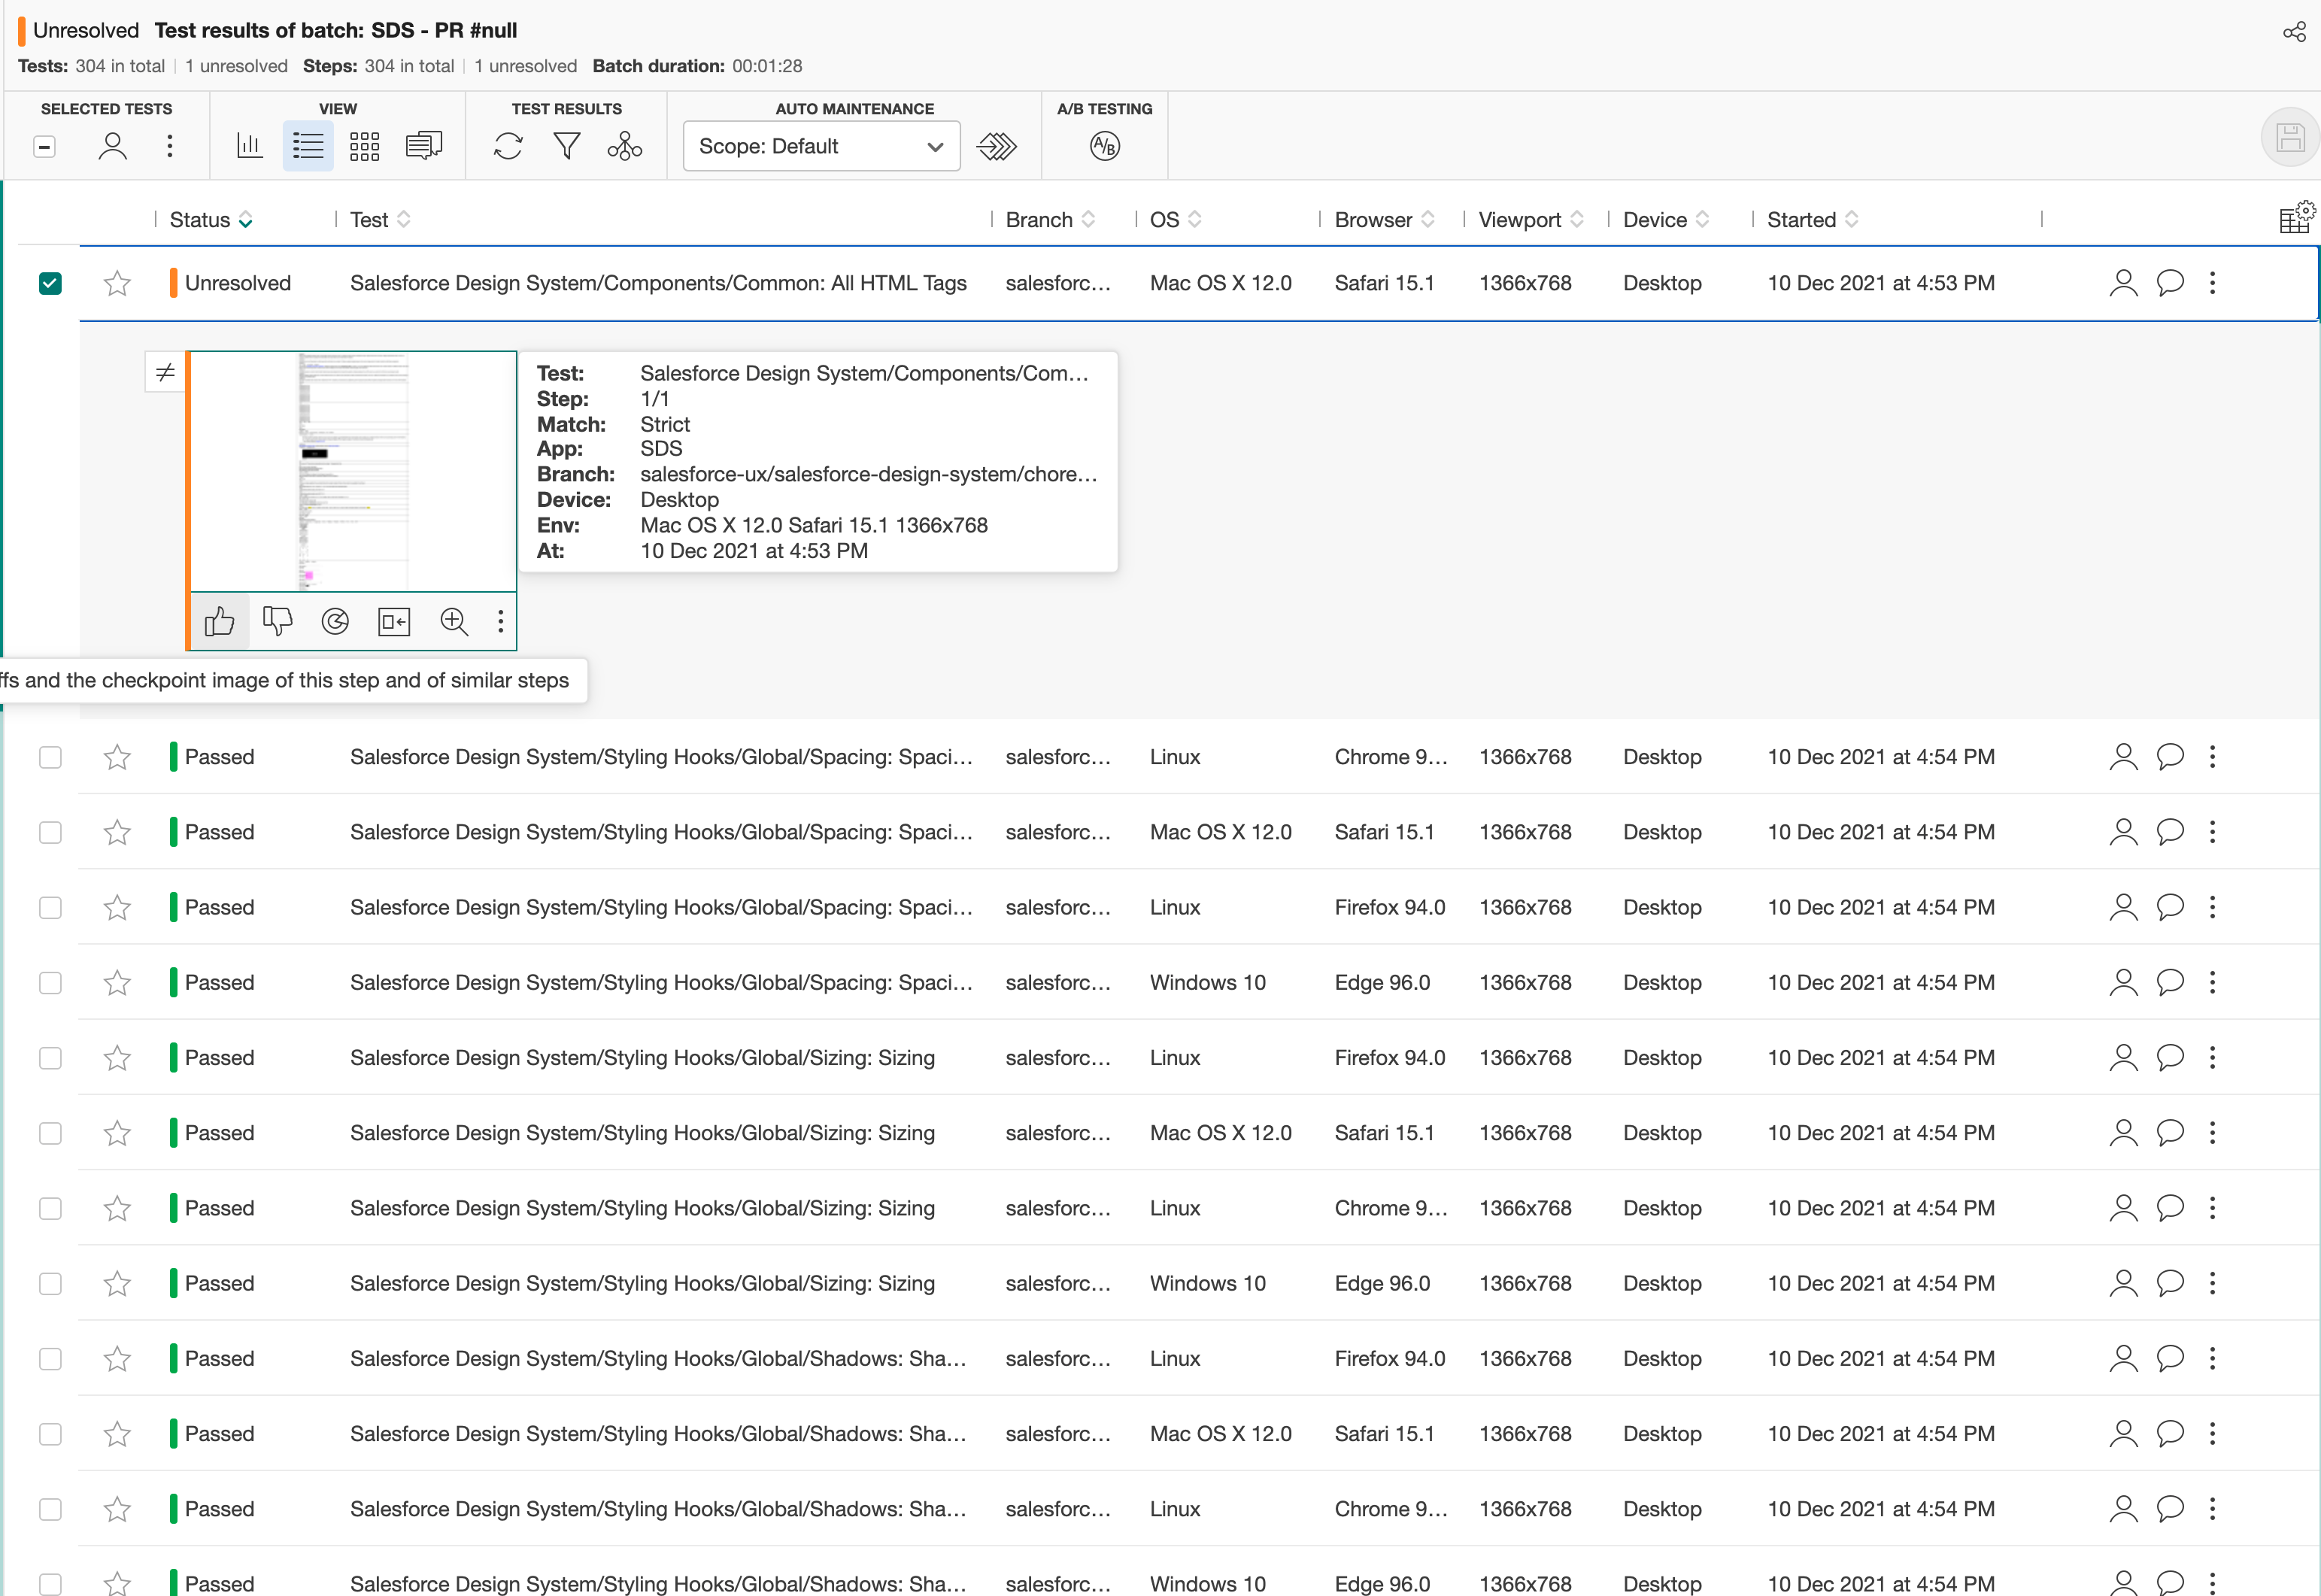
By clicking on the line item with an "Unresolved" status, you can review the diff to see if the changes were intended or not.
If the changes were not intended, you should leave the applitools dashboard and check your code for where the regression may have happened.
If the changes were intended, you need to update the status of the diff to "Passed". This is done by hovering over the diff image and clicking the 👍 button.
Do this same process for any subsequent diffs.
Saving a new baseline
Once you have reviewed and updated the status of the diffs to "Passed", it is then time to update the baseline.
By clicking the save icon in the top right, you can update the baseline.
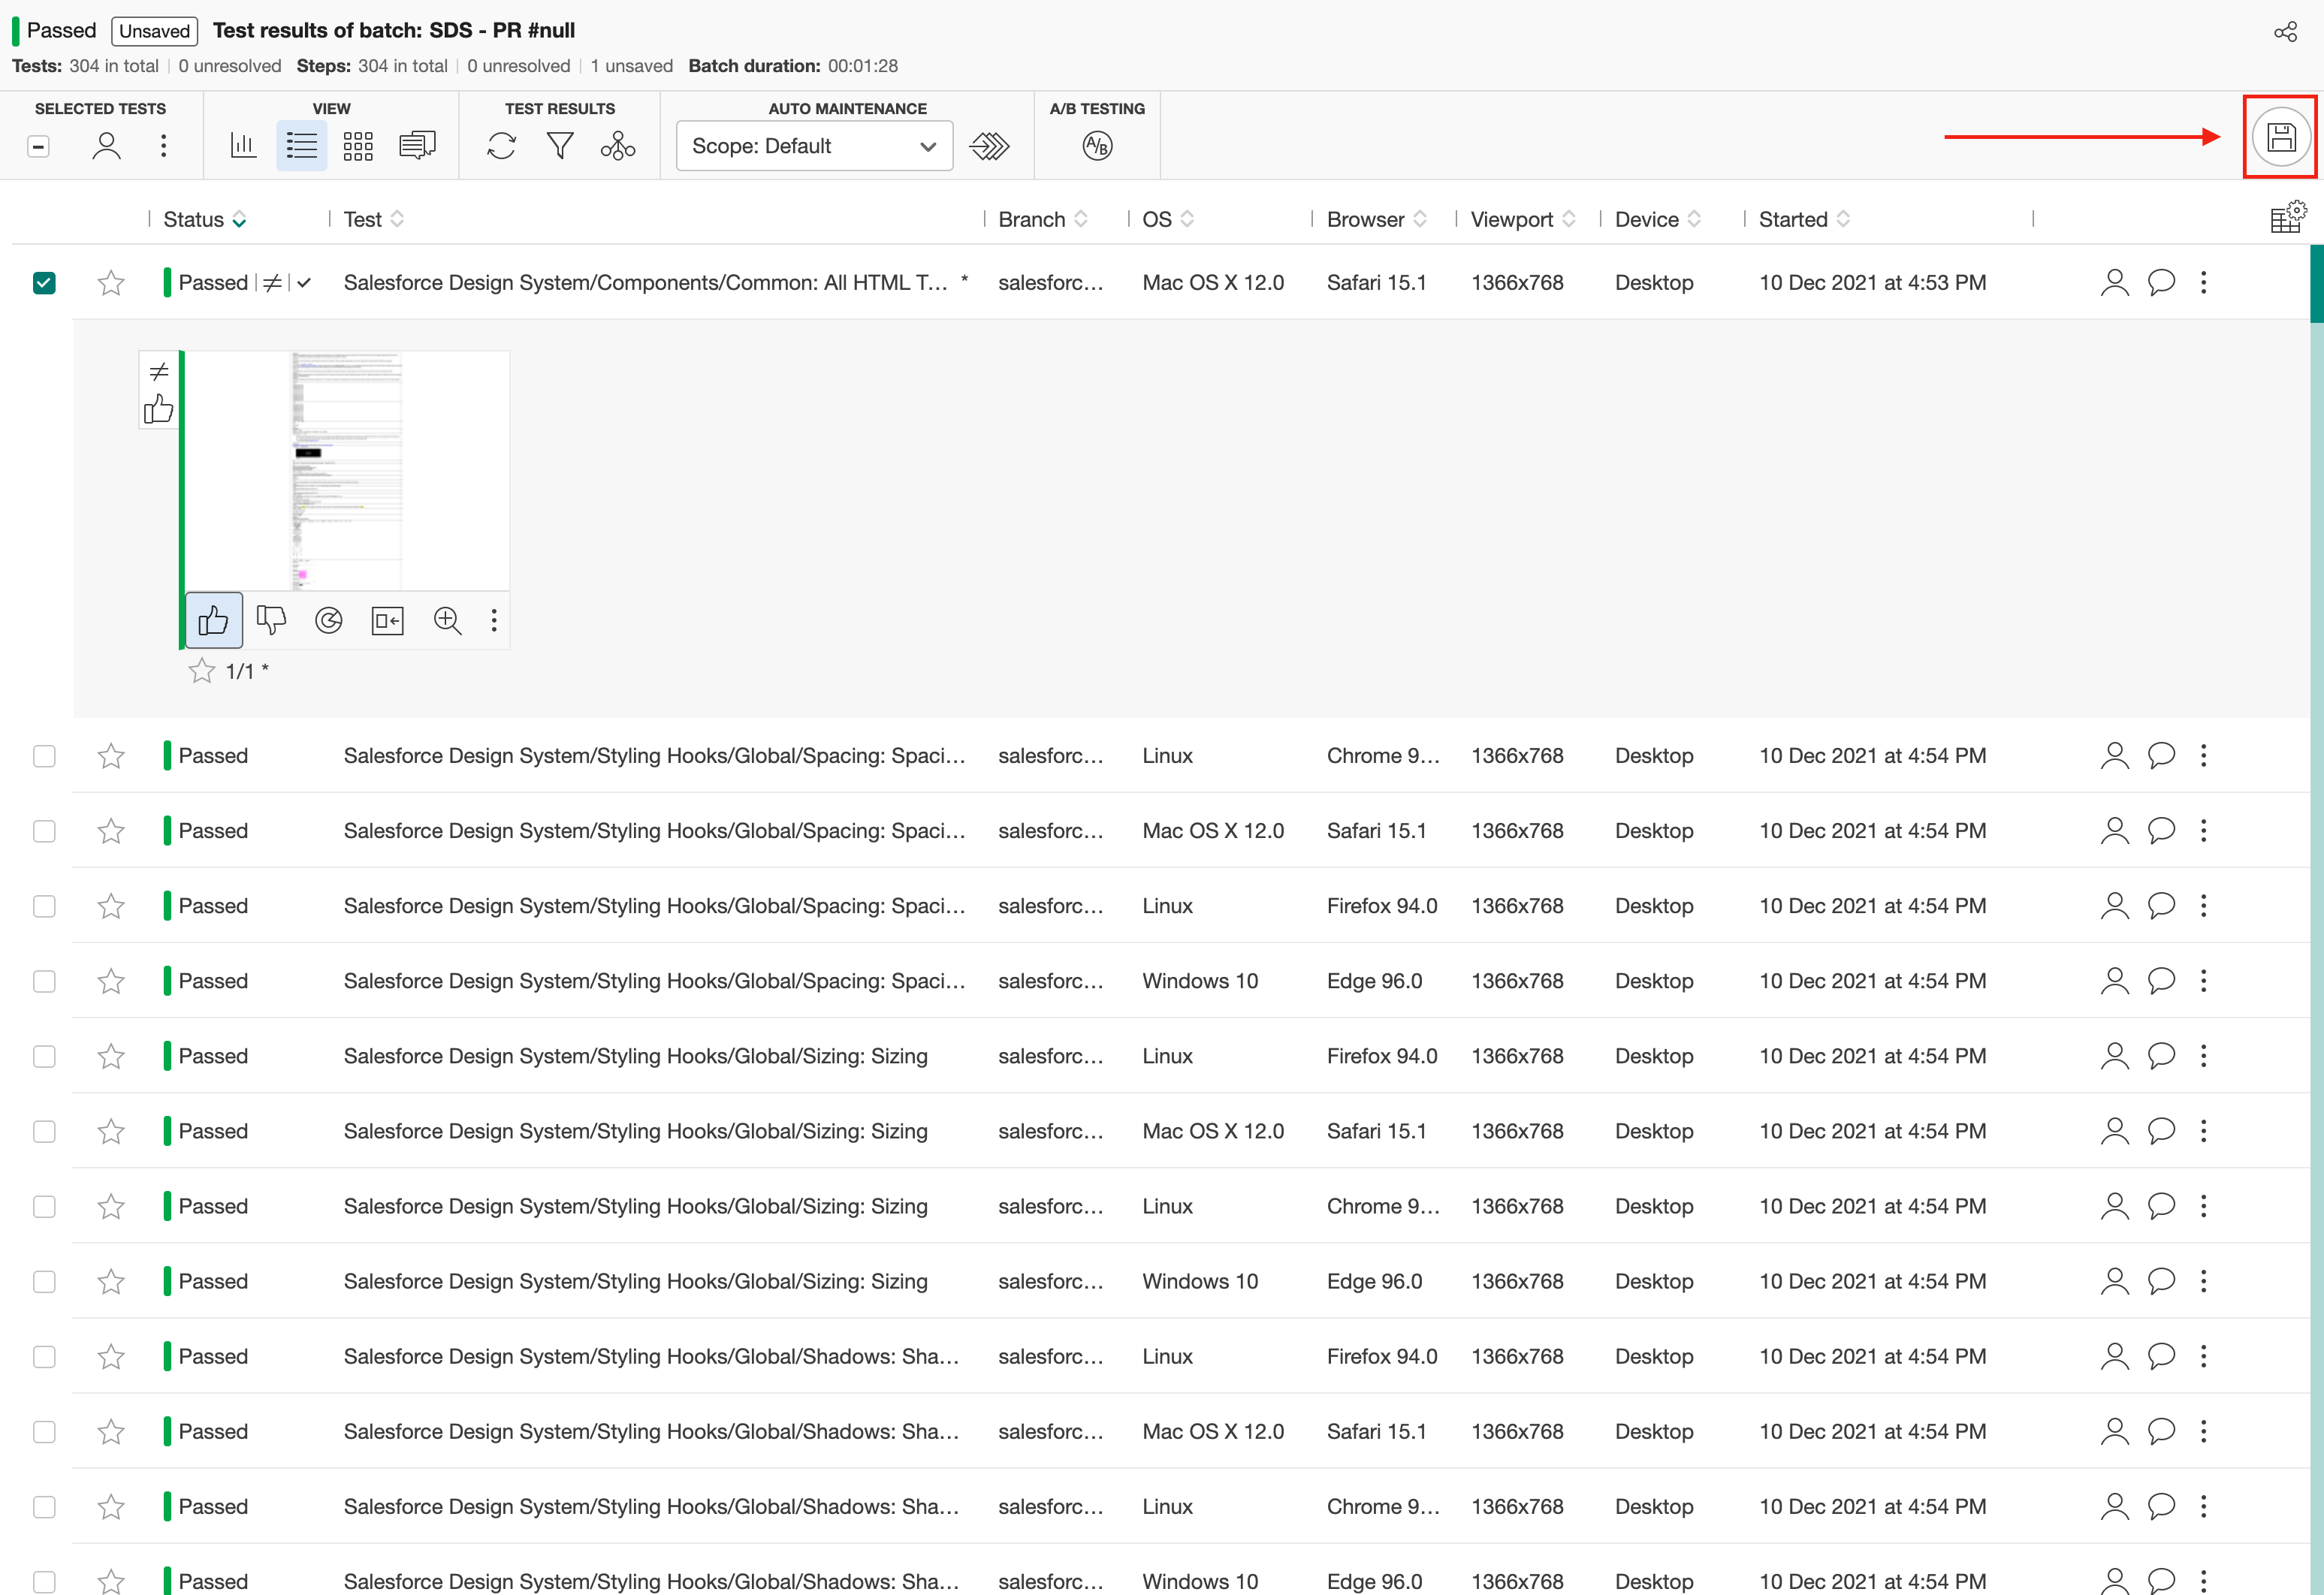
Once your baseline is updated, you should have all passing checks in your PR and is ready to merged after approval.